Automated Installation
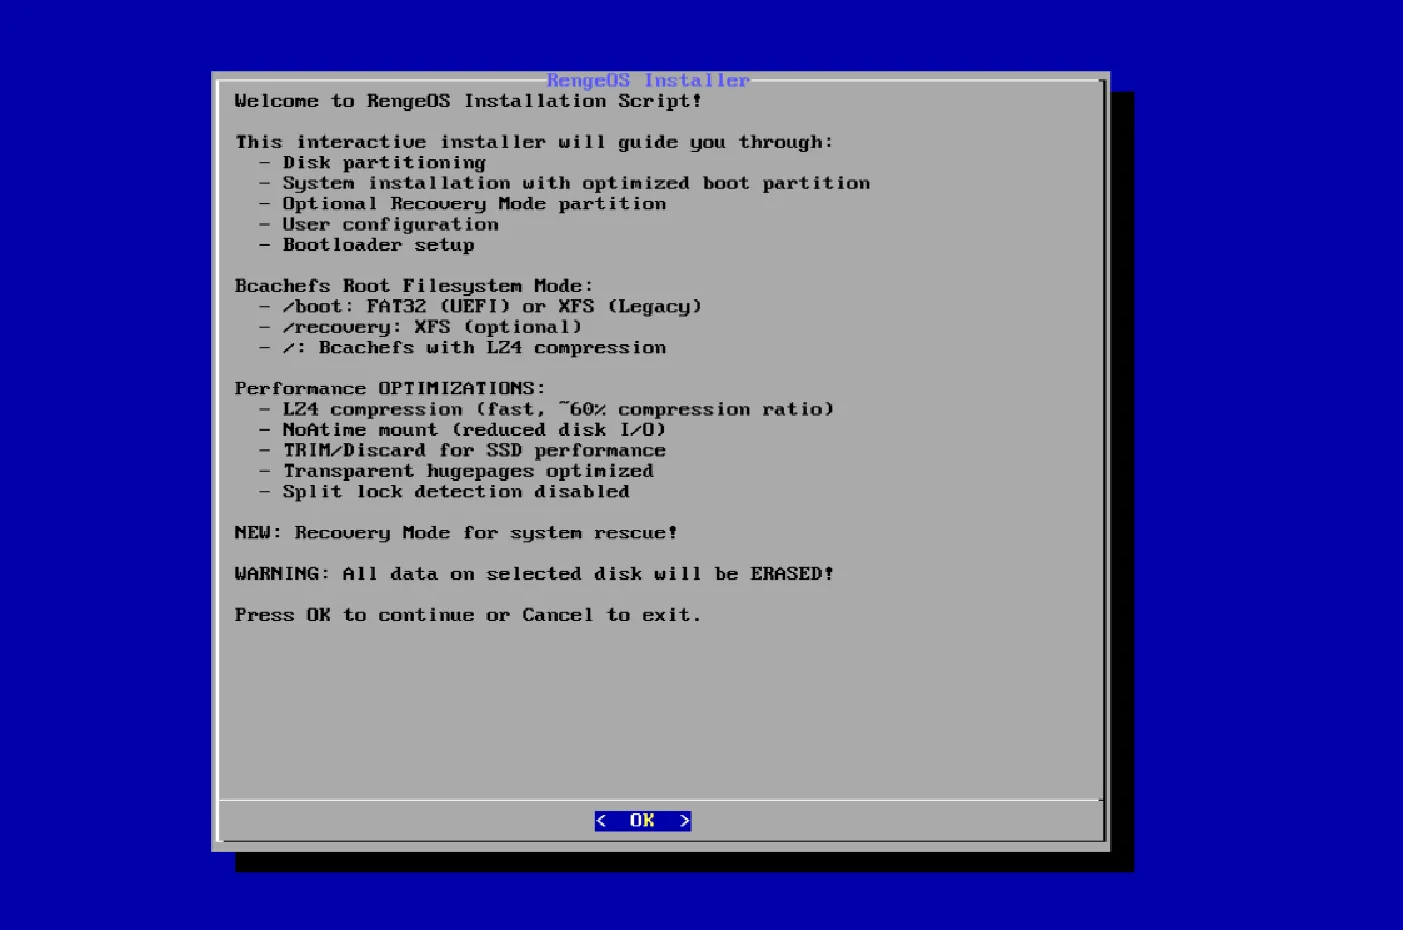
Essentially, we’ll use ros-installer to automate the installation process from a Live ISO to the machine using the unsquashfs method and some other related techniques during the process.
Boot into Live ISO
Section titled “Boot into Live ISO”-
First, we need to plug in the bootable USB drive containing the ISO file. Then, depending on your computer’s hardware manufacturer, access the boot menu and boot from that USB drive.
-
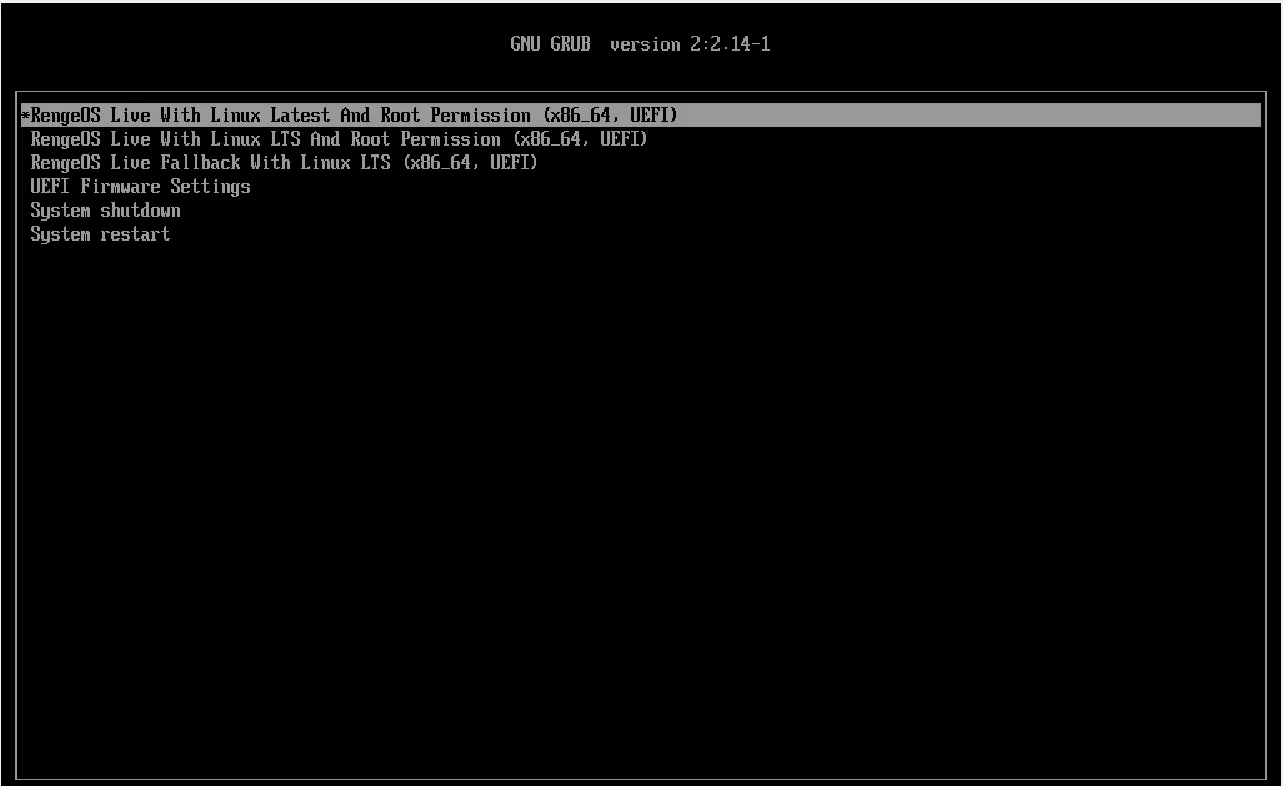
Then you will see the boot menu will look like this (UEFI). For Legacy BIOS, it will display similarly but with a slightly different interface.
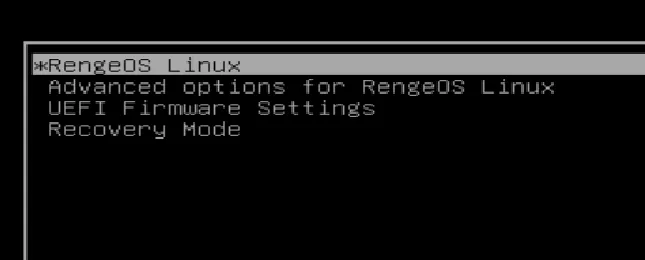
Start the installation process
Section titled “Start the installation process”- After the systemd process is complete, you will see a screen like this (RengeOS is inherently a minimal distribution).
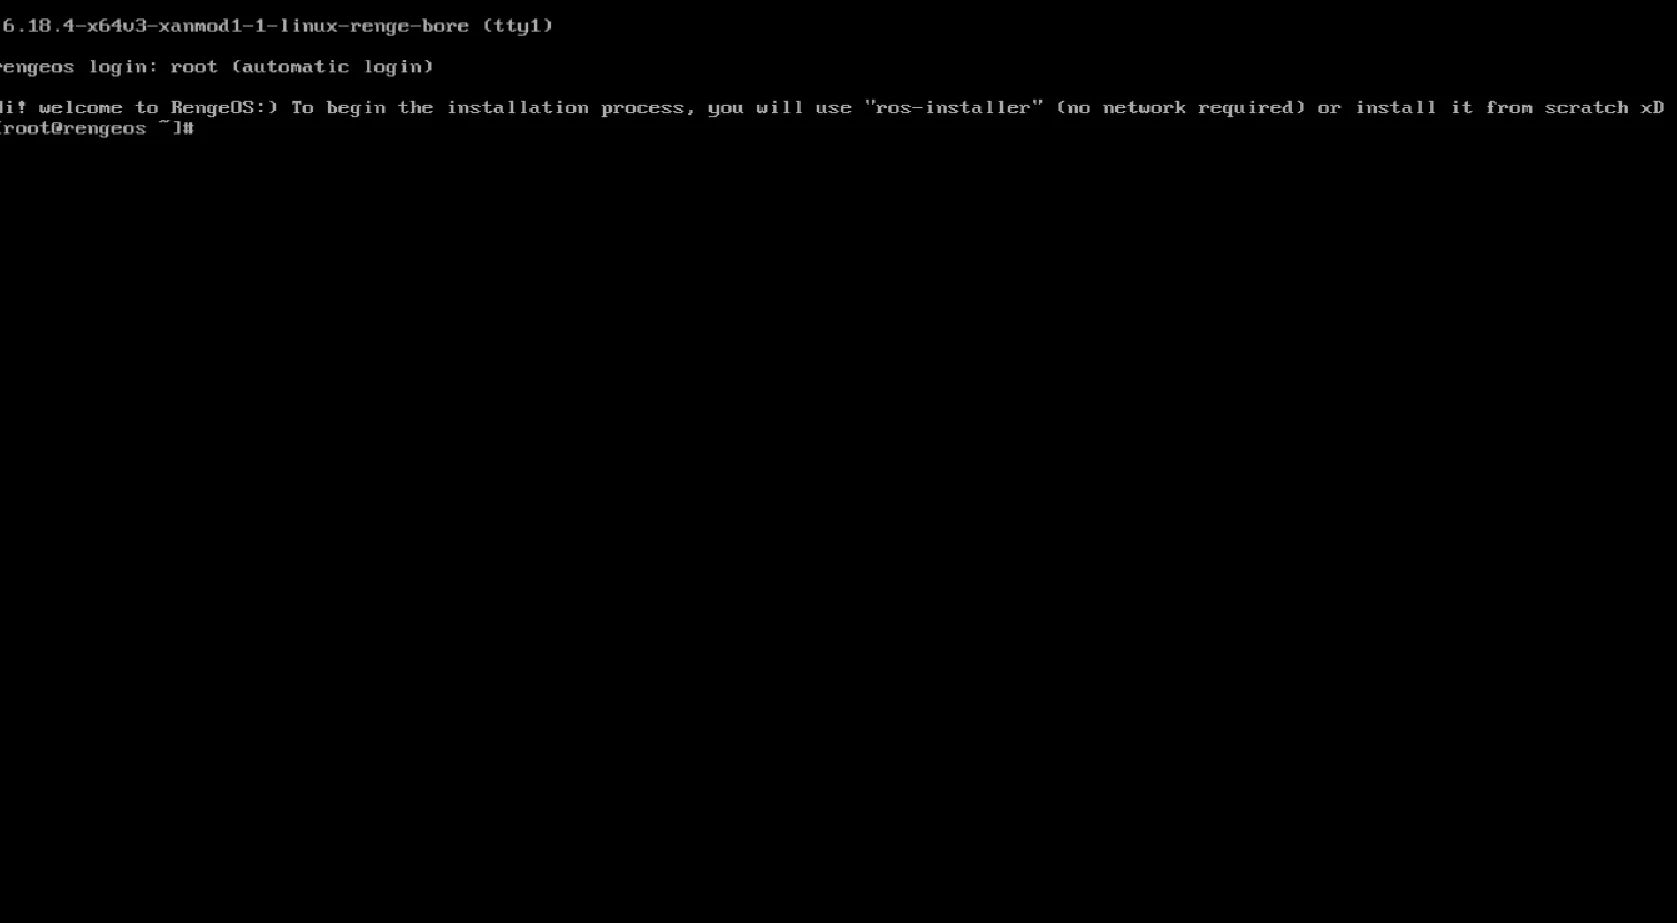
- Next, we will need to begin the installation process with
ros-installer
ros-installer- Immediately after you run the installer, this interface will appear on the screen.
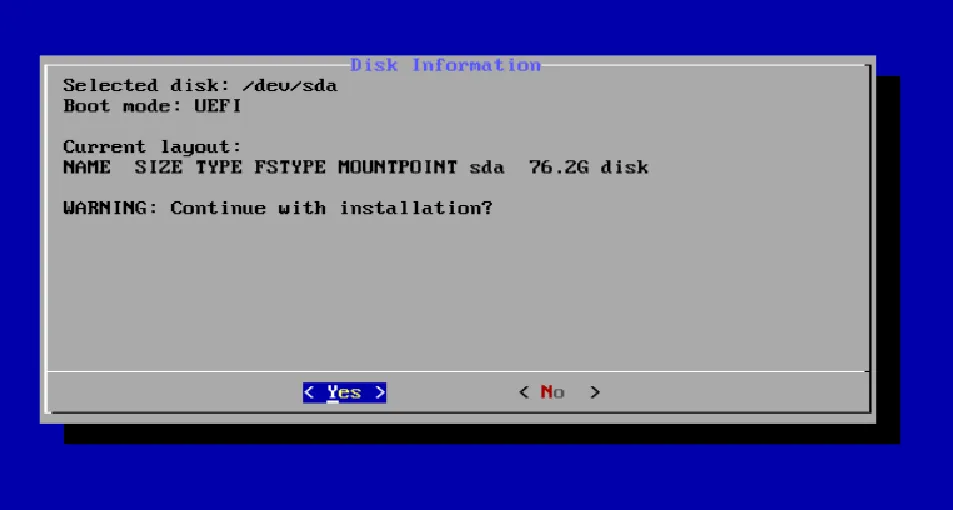
Choose a hard drive to install on
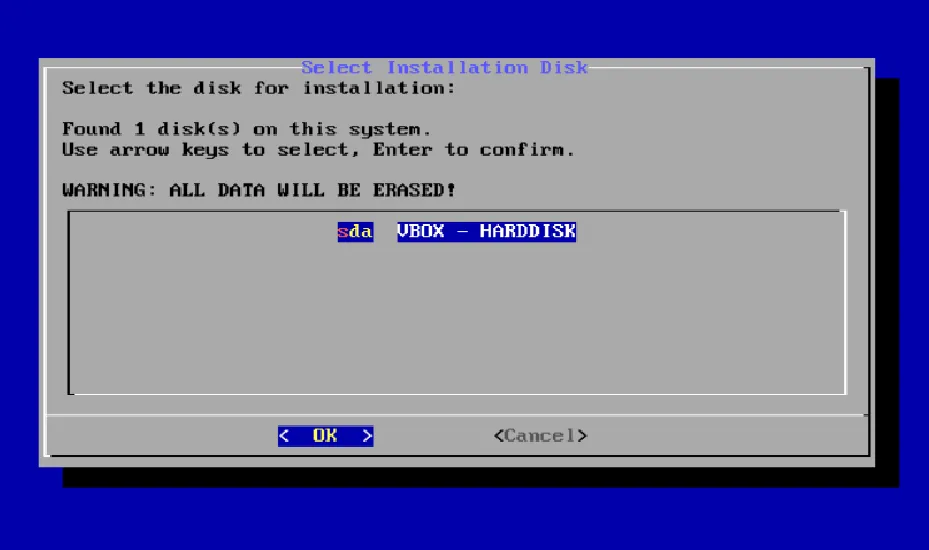
Section titled “Choose a hard drive to install on”- From here you can see the choice of hard drive to which RengeOS will be installed.
- Here, the drive I want to install it on is
sda
 |  |
|---|
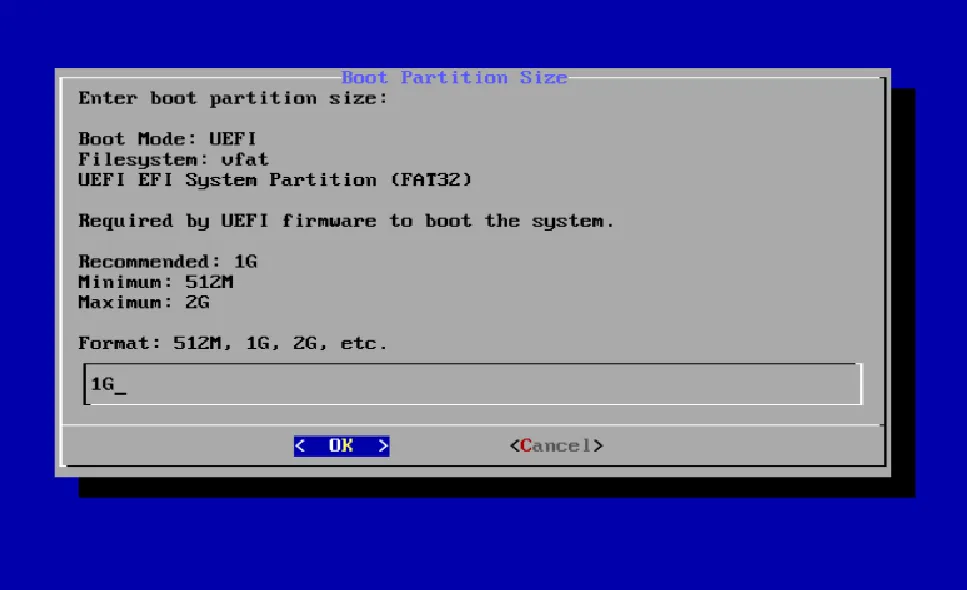
Disk partition
Section titled “Disk partition”- Next, choose your desired size for the
/bootpartition (the default is 1GB).
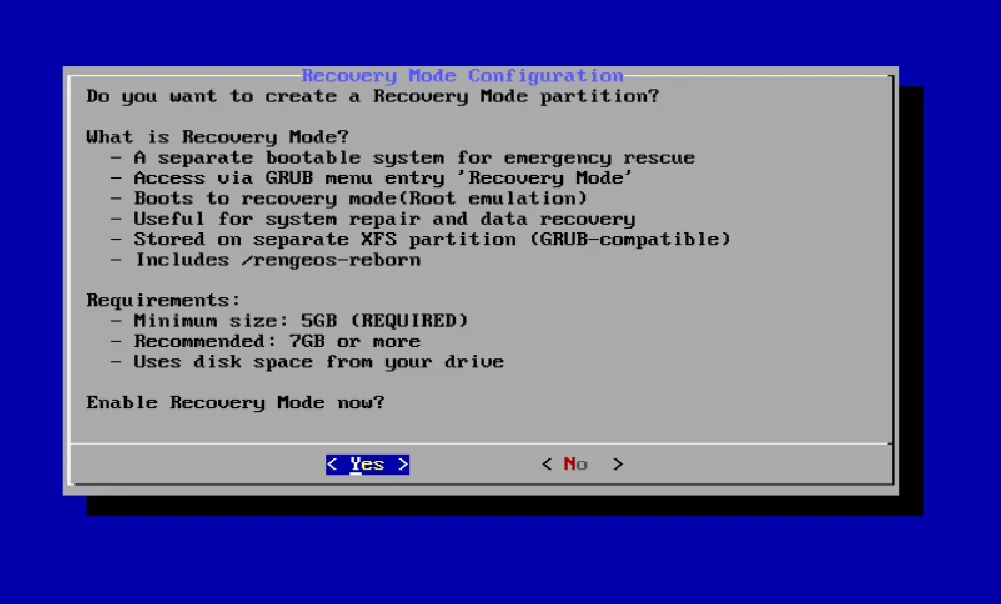
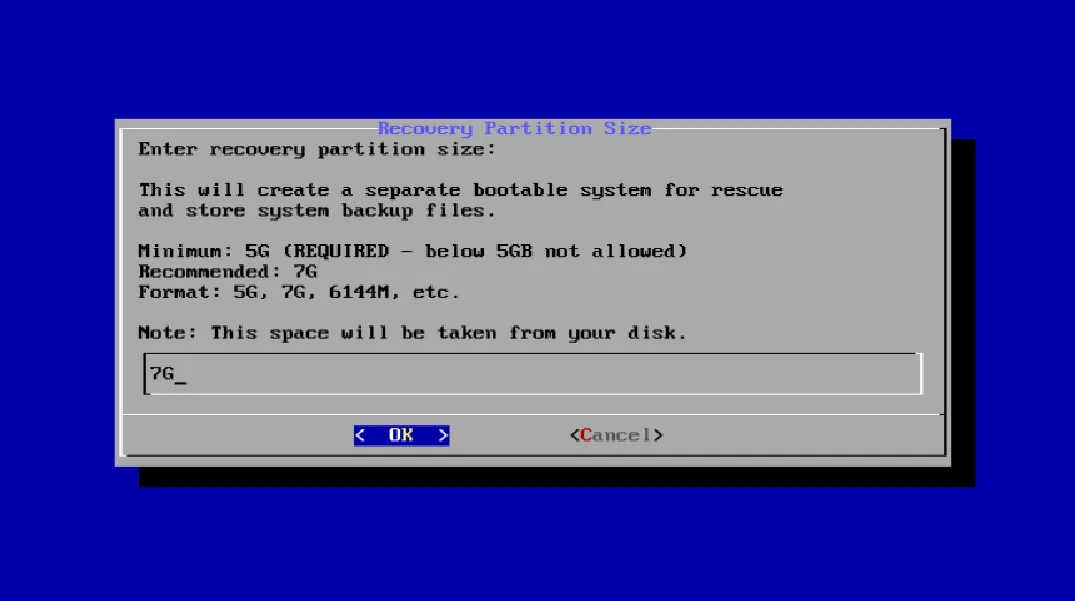
- After that, it will ask if you want to enable Recovery Mode.
- If you’re someone who likes to experiment and accidentally messes up your system like me :)
then you should probably enable Recovery Mode because it can help restore your system to its original state as
when it was first installed using
ros-reborn, or you canmounta damaged root partition to repair it or do many other things.
 |  |
|---|
- If you select Yes, after the installation is complete you will see it in the GRUB menu as shown below.
- If you choose No, that’s perfectly fine because recovery mode is essentially a second root partition on the device, created to help users repair the main root partition more easily without needing a Live ISO.
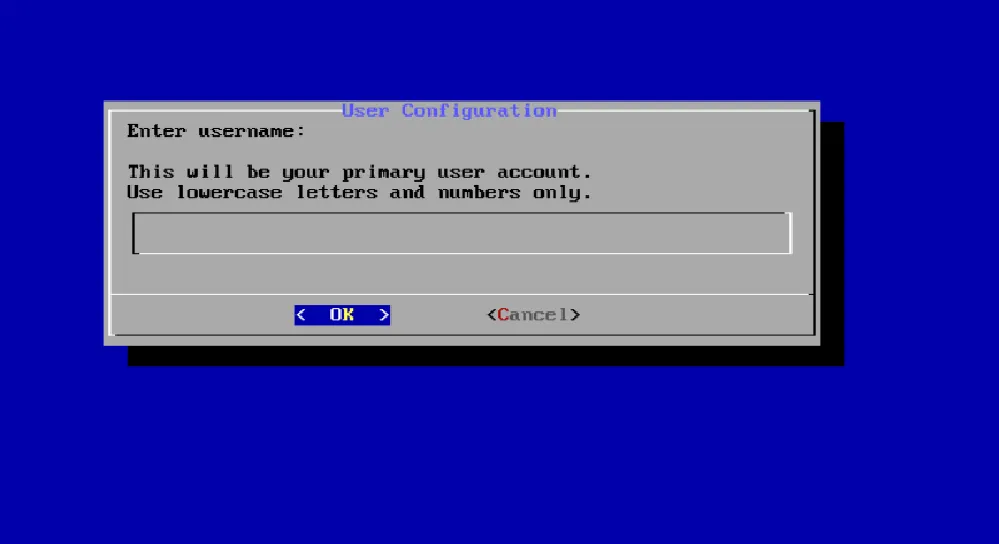
System configuration
Section titled “System configuration”- Now it will ask you for your computer’s hostname, so enter the name you want.

After completing that, the next step is to provide the user’s username
Timezone and System locale
Section titled “Timezone and System locale”- Now we need to select the time region, here, I’ve chosen
Asia/Ho_Chi_Minhbecause I live there
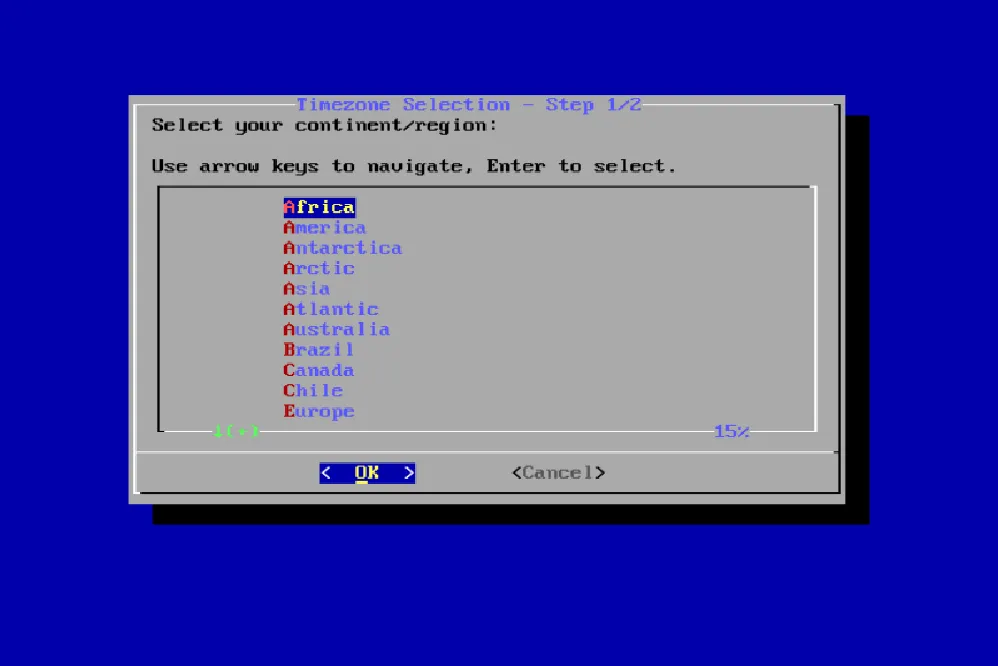
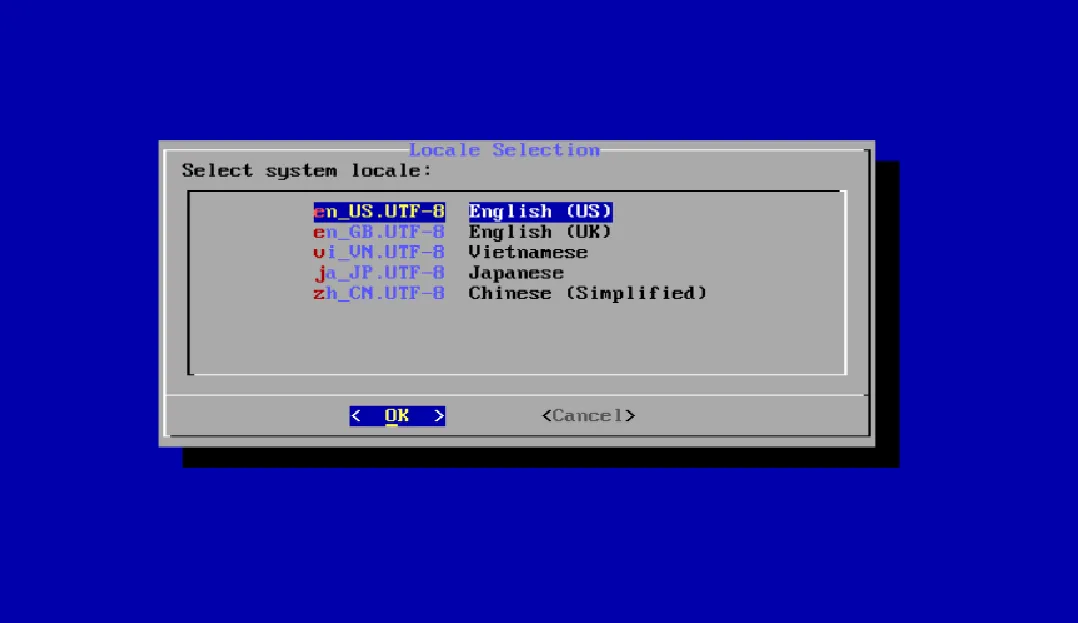
- After selecting your region, the next step is to choose your system locale.
- If you’re unsure what to choose, just select
English (US)as it’s the default standard on most other distributions, and I chose it too.
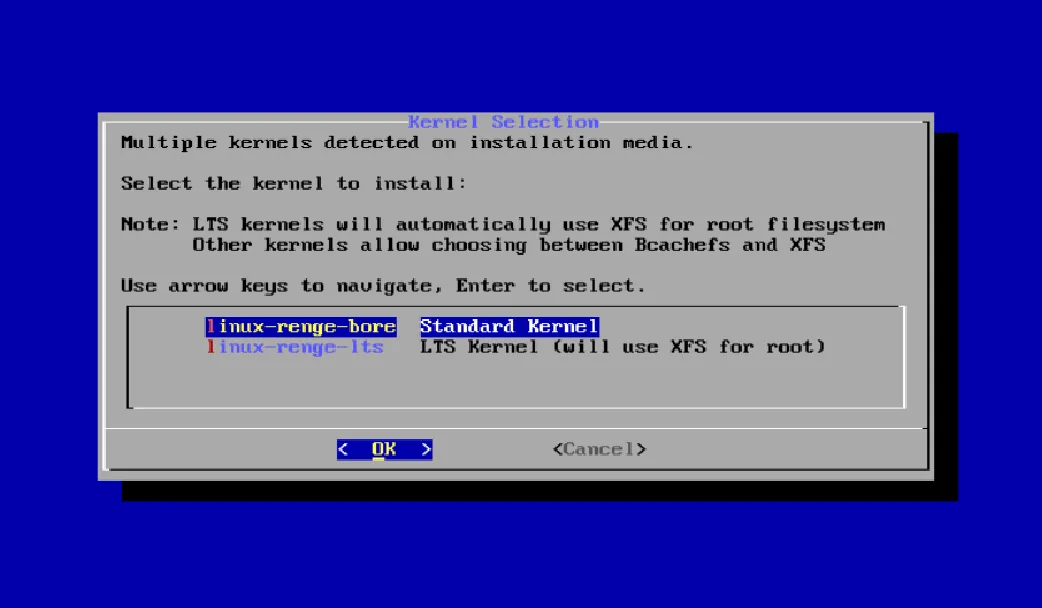
Kernel selection
Section titled “Kernel selection”- The next step is to select the kernel that will be installed and used as the default.
-
linux-renge-boreis the latest kernel based on the Xanmod Kernel and BORE Schedule, with O3 optimization and other features that make laptops/desktops/gaming significantly smoother, reducing lag and stutter during heavy background tasks. However, it is not optimized for long-term workloads or servers. -
linux-renge-ltsis also the latest kernel (in terms of official Linux kernel versions for LTS) based on the Xanmod Kernel, built with O3 optimization. It excels in smoothness, low latency, and better laptops/desktop/gaming performance than the regular kernel, but maintains long-term stability and is less optimized thanlinux-renge-bore.
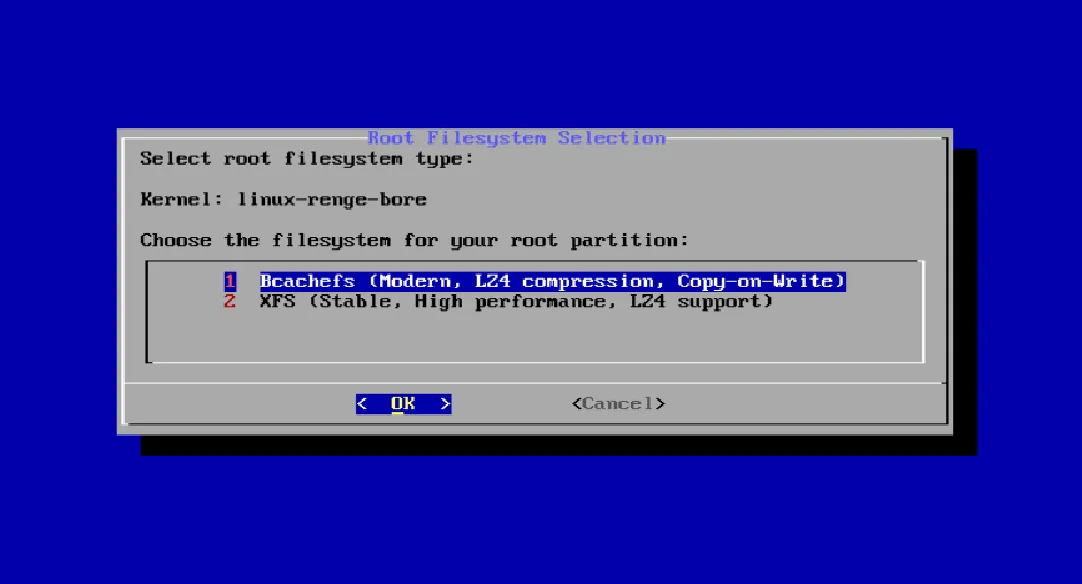
Filesystem
Section titled “Filesystem”- After selecting your desired kernel, you will see something like this (for the
linux-renge-boreoption). - If we selected
linux-renge-lts, only the xfs filesystem option will be displayed because it doesn’t support bcachefs filesystem. - Anyway, that’s your decision, but I still recommend choosing bcachefs filesystem if possible because RengeOS currently has strong support for it.
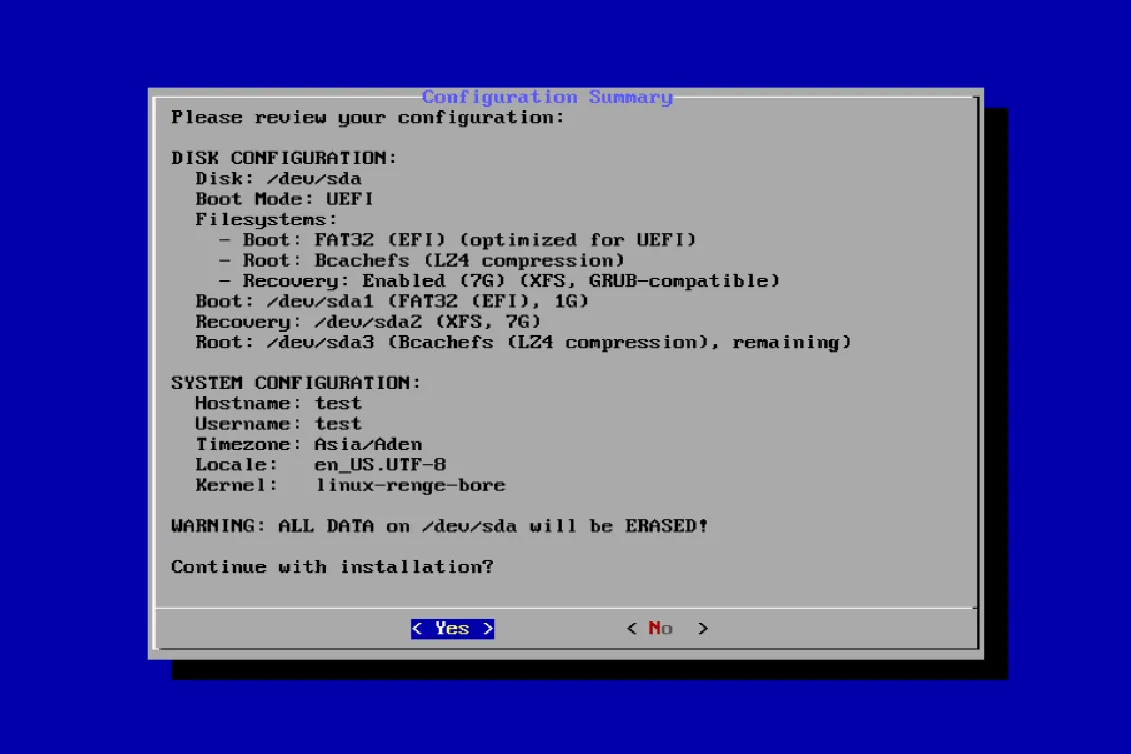
Wait for the setup process to complete
Section titled “Wait for the setup process to complete”- Now we need to review and confirm whether it has met expectations.
- If you’re okay with it, you can select Yes. Otherwise, select No, and you can start the process again.
 |  |
|---|